Getting Started
Everything you need to set up the Signposting Toolkit for your surgery, from first login to going live.
Time required:
- Technical setup — 30–60 minutes for an admin lead
- Clinical review — two clinicians working side by side in one session, each working through half the symptom library
Most practices complete technical setup in one sitting and book the clinical review session separately.
Overview
Setup happens in two places:
- The Setup Checklist — tracks your progress and links you to each configuration area
- The Onboarding Wizard — collects information about how your surgery operates, used to tailor AI-generated instructions
The Setup Checklist is your home base throughout this process. Return to it whenever you need to see what’s done and what’s next.
Step 1 — Log in and open the Setup Checklist
When you first log in as a surgery admin, you’ll see a welcome banner on your dashboard.
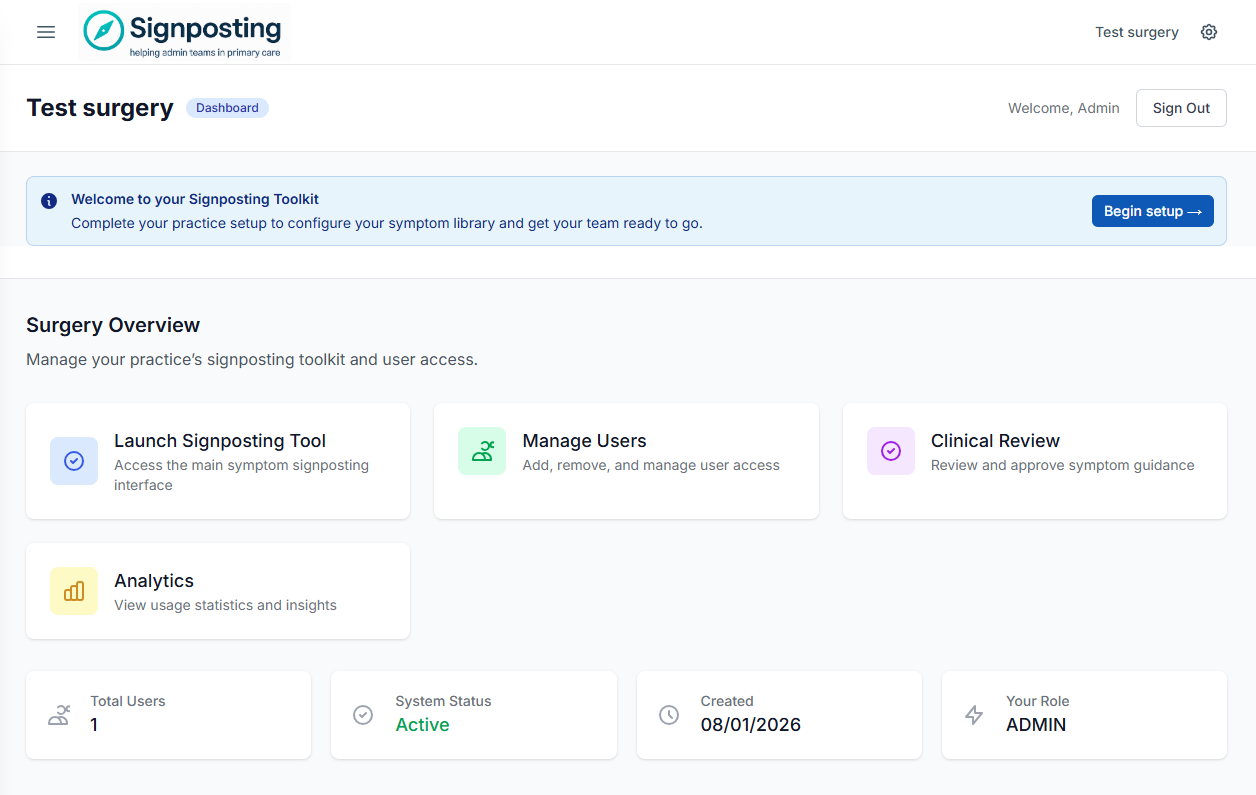
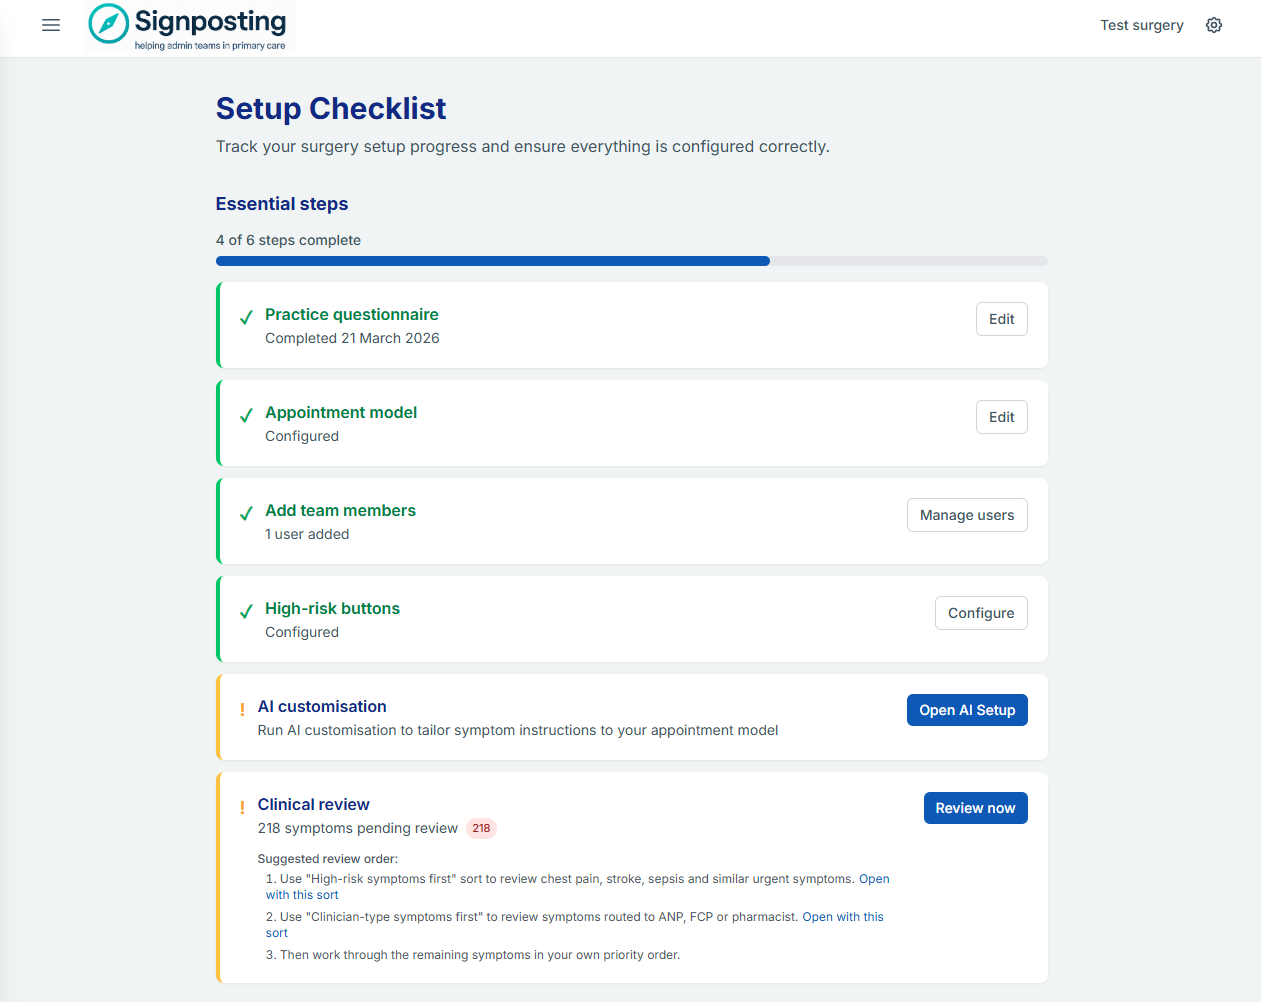
Click Begin setup to open the Setup Checklist. You’ll see two sections:
- Essential steps — must be completed before your team can use the tool safely
- Recommended steps — not required to go live, but will improve your team’s experience
The checklist tracks completion automatically as you work through each step. You can leave and return at any time — your progress is saved.
Tip: Each checklist item has a button that takes you directly to the right area of the app. Use the ← Back to Setup Checklist link at the top of each page to return when you’re done.
Step 2 — Complete the Practice Questionnaire
The practice questionnaire collects information about how your surgery operates. This is used to tailor the toolkit — particularly when using AI Surgery Customisation to rewrite symptom instructions for your local context.
Click Start next to Practice questionnaire in the checklist.
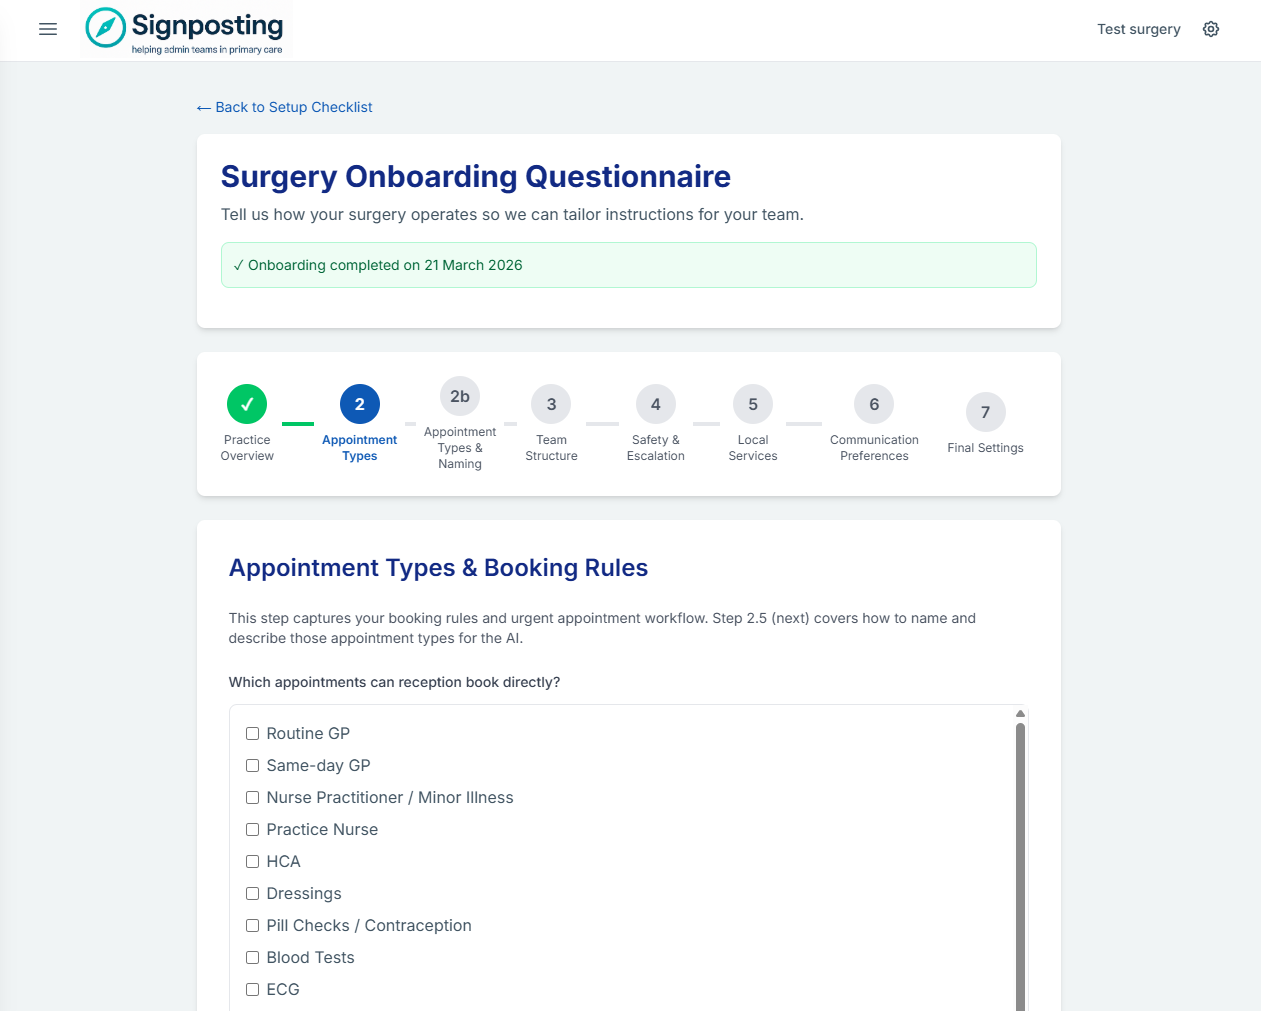
The questionnaire has seven steps:
- Practice overview — your surgery name and whether you use a Duty Doctor model
- Appointment types and booking rules — which appointments reception can book directly, and any they must not
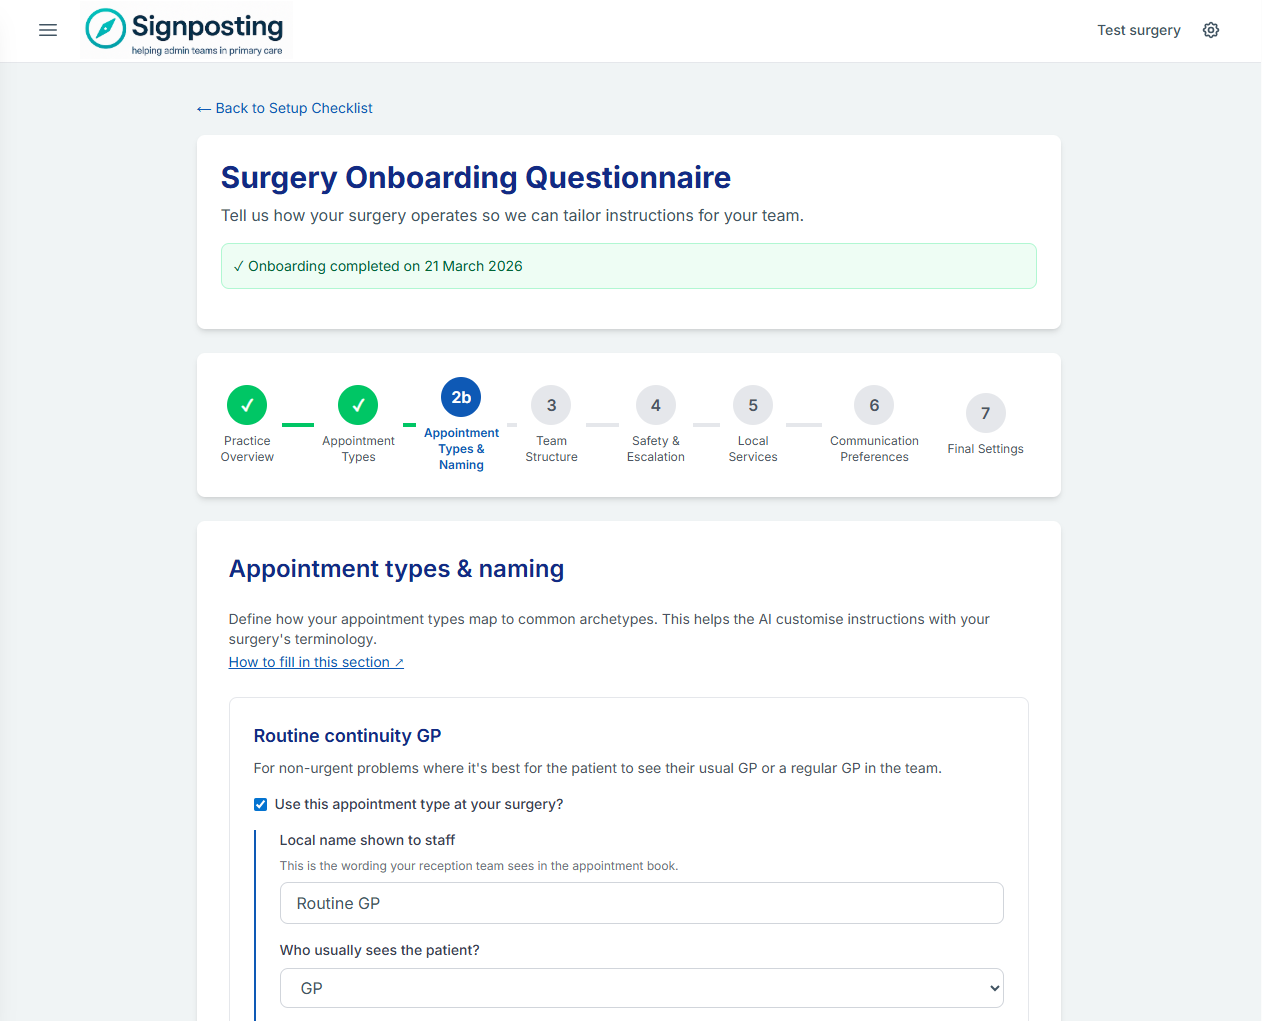
- Appointment types and naming — maps your local appointment names to standard types so the AI uses the right terminology
- Team structure — which clinicians you have on site and any role-specific routing rules
- Safety and escalation — who reception should escalate to when worried about a patient
- Local services — MSK, mental health, social prescribing, and other community pathways
- Communication preferences — how detailed and how localised AI-generated instructions should be
Take your time on Step 3 (appointment types and naming). The quality of AI-customised instructions depends directly on what you enter here. Vague or incomplete descriptions produce generic output.
What good looks like
Here is the same Minor Illness Clinician configured two different ways:
| Field | Well-filled entry | Poorly-filled entry |
|---|---|---|
| Local name | ANP Clinic (Minor Illness) | ANP |
| Role | ANP | ANP |
| Conditions | Earache, sore throat, UTI, skin infections, conjunctivitis | (empty) |
| Restrictions | Not chronic disease, mental health, or under-2s | (empty) |
| Under-5s | Accepts children aged 2 and over | No |
The well-filled entry gives the AI enough detail to route “sore throat in a 4-year-old” to the ANP Clinic. The poorly-filled entry gives the AI almost nothing to work with.
Click Finish & Save on the final step. The checklist updates automatically to show completion.
Step 3 — Configure the Appointment Model
The appointment model defines the appointment types and clinicians available at your surgery. This appears in symptom instructions and drives how the tool directs patients.
Click Edit next to Appointment model in the checklist.
Add each appointment type your reception team uses. For each one, provide:
- The local name as it appears in your appointment book
- The clinician role
- A brief description of when this type is used
Click Save when done. The checklist item will update to show the number of appointment types configured.
Step 4 — Add Team Members
Add at least one reception or care navigation user so your team can log in.
Click Manage users next to Add team members in the checklist.
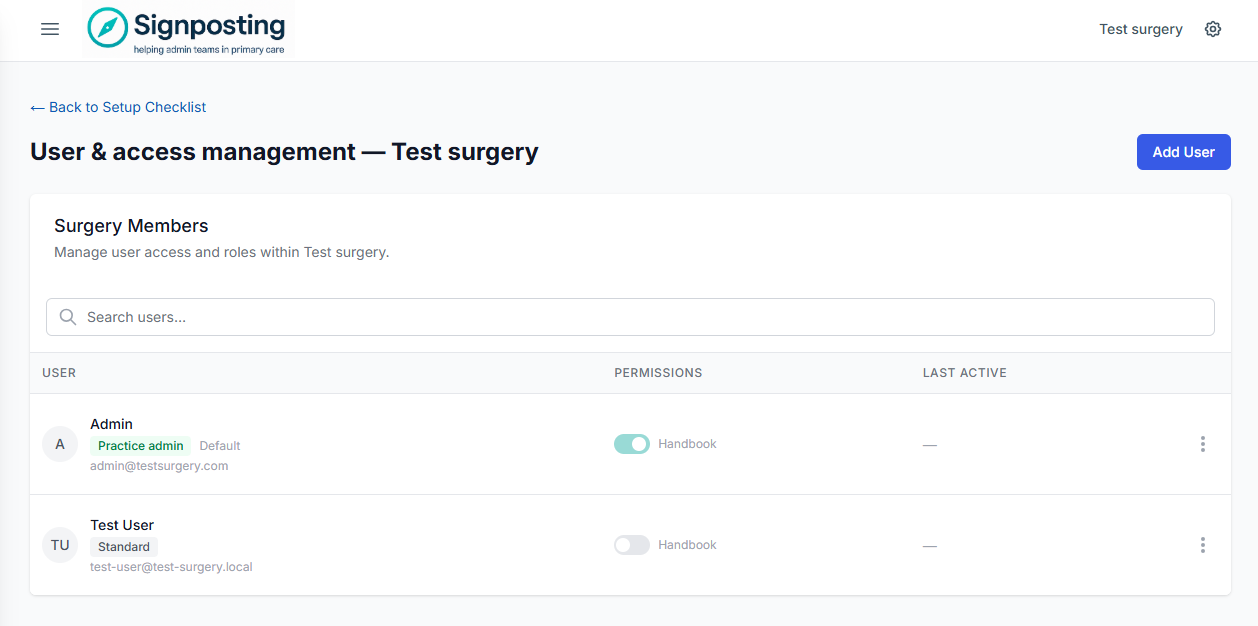
Click Add User and fill in their name, email address, and role. Standard users can view and use the signposting tool. Admin users can manage settings and approve clinical changes.
A confirmation appears when the user is added successfully. You can add more users at any time — this step is marked complete once at least one non-admin user exists.
Step 5 — Check High-Risk Buttons
High-risk buttons give reception staff one-tap access to the most urgent symptoms — conditions like Sepsis, Anaphylaxis, Stroke, and Chest Pain that must never be missed.
Click Configure next to High-risk buttons in the checklist.

A set of default high-risk buttons is enabled for all surgeries. Review the list and confirm it reflects your local priorities. You can add custom buttons, reorder them, or disable any that are not relevant.
This step is marked complete once at least one high-risk button is enabled.
Step 6 — Run AI Customisation
AI customisation rewrites the base symptom library using your surgery’s appointment model and practice profile. This step is only available once the practice questionnaire is complete.
Click Open AI Setup next to AI customisation in the checklist.
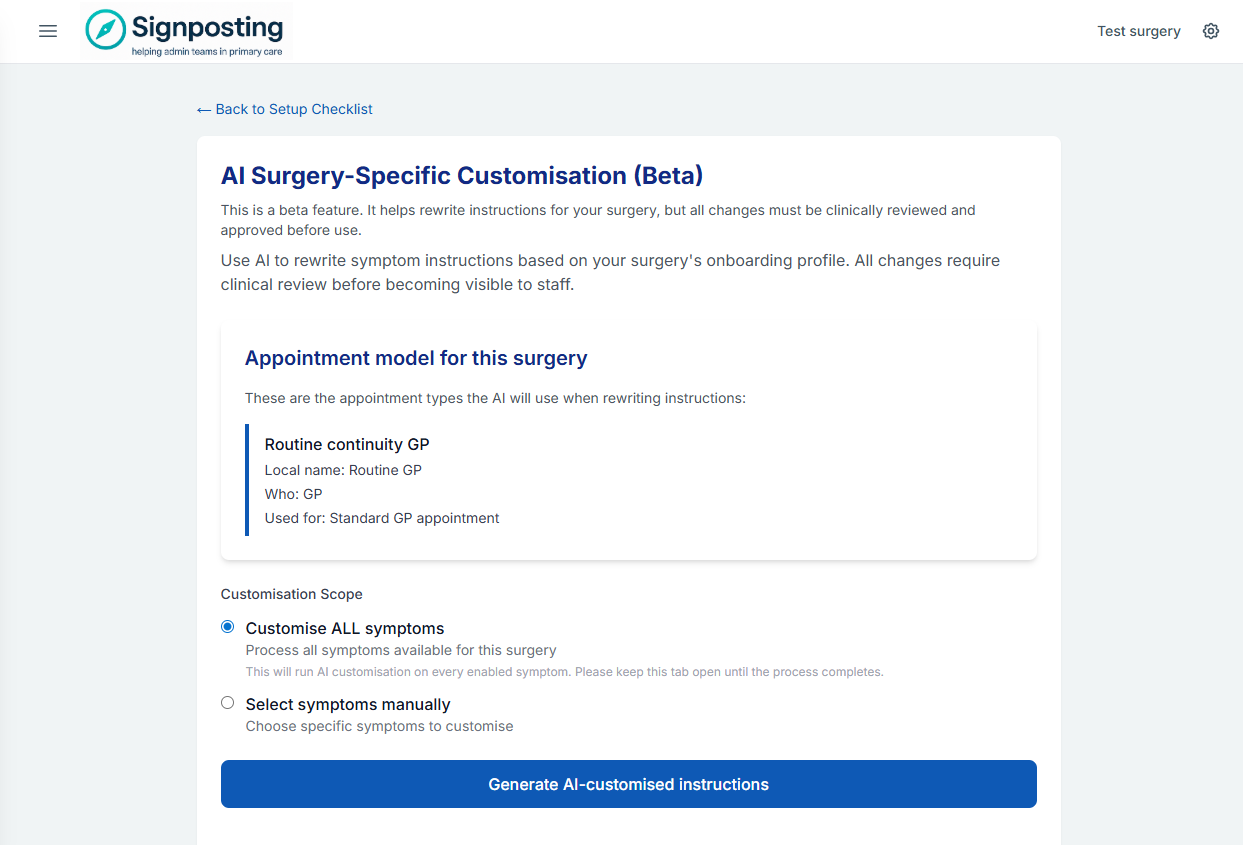
Select the symptoms you want to customise and click Run customisation. The process runs in the background — you do not need to keep the page open.
What to expect:
- The AI defaults to conservative routing. If your profile doesn’t clearly indicate that a clinician handles a condition, the AI will preserve the GP pathway. This is by design.
- Every AI-customised instruction is set to Pending review. A clinician must approve each one before it goes live.
- Some symptoms will be skipped — this is normal. Not every symptom needs customisation.
- You can re-run customisation at any time if you update your practice profile.
Step 7 — Complete Clinical Review
Every symptom instruction must be clinically approved before it goes live. The clinical review step is complete when fewer than 10 symptoms are pending review.
Click View next to Clinical review in the checklist.
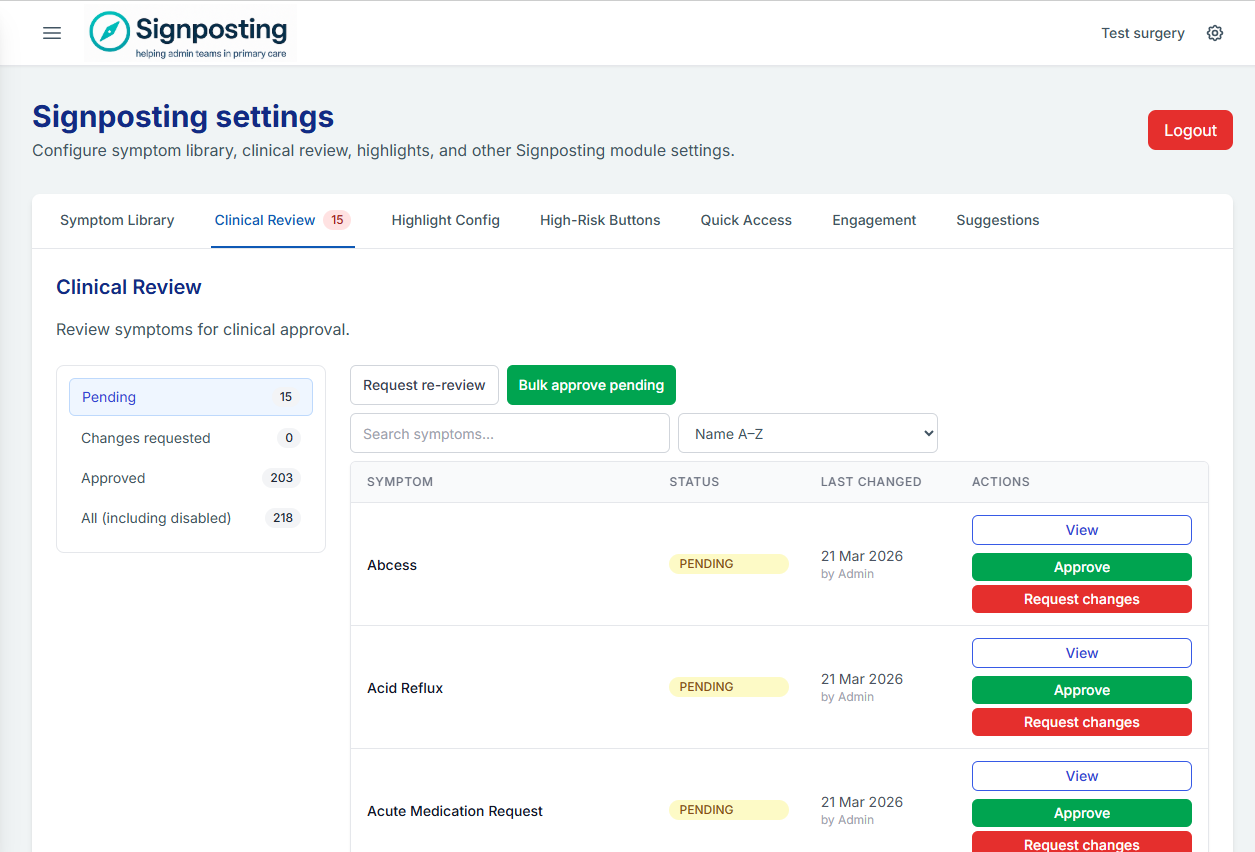
For each pending symptom, review the instruction, check that routing makes sense for your surgery, and click Approve. If an instruction needs changing, edit it first — any edit resets the status to pending, so the final version is always what gets approved.
Tip: Work through Intro-level symptoms first if you have used AI customisation. These cover the most common presentations and are quickest to review.
How to work through the review efficiently
We recommend two clinicians review the library together in one session, working side by side so queries and local decisions can be discussed and agreed as you go.
To divide the work evenly, one clinician sorts the symptom list A–Z and the other Z–A. Both start from their respective ends of the alphabet and work towards the middle — halving the time without any duplication.
Reviewing each symptom
Click on a symptom name in the Clinical Review list to open the full review screen. For each symptom you can:
- Mark Approved — the instruction is correct for your surgery and ready to go live
- Request changes — flag the instruction for updating without stopping to edit it now. A dialog lets you add a note and optionally disable the symptom until changes are made
- Edit directly — make the change on screen immediately. Any edit resets the status to Pending, so the final version is always what gets approved
- Hide symptom for practice — remove the symptom from your library if it is not relevant to your surgery
Once you have reviewed a symptom, click Next to move to the following one — or Previous if you are working from the Z end of the alphabet. You do not need to return to the list between each symptom.
Symptoms marked “Request changes”
These appear in the Changes Requested queue after your session. Either the same clinician can return to action them, or the Practice Administrator can arrange for edits to be made — but we recommend the clinician has final sign-off before any changed instruction is approved.
Setup Complete
When all essential steps are ticked, you’ll see a confirmation banner.

Your surgery is ready to go live. Share the login URL with your reception team and hold a brief 10-minute intro session to walk them through the tool.
Recommended Steps
These steps are not required to go live, but will improve your team’s experience.
Appointment directory — Add local services and appointment types so reception can search for them directly. Particularly useful for community referrals and recurring appointment types.
Highlight rules — Configure text patterns that apply colour highlights to symptom instructions. Useful for drawing attention to red-flag phrases or locally important guidance.
Practice Handbook — Add surgery-specific guidance pages for your reception team. Good for local policies, contact numbers, and procedures that don’t fit neatly into the symptom library.
Going Live
Most practices adopt the toolkit fully within 24 hours of going live. Before you do:
- Pick 5–10 common symptoms and test them with a reception team member
- Confirm highlighted text makes sense
- Check that appointment options reflect what’s actually available
- Make sure high-risk flags behave as expected
Fix anything that looks wrong now — it’s much quicker before the team is relying on it.
Keeping It Up to Date
The clinical review cycle is your ongoing governance loop. Return to it whenever:
- New symptoms are added or AI customisation is re-run
- Local pathways or appointment types change
- A reception team member flags that an instruction doesn’t match reality
Need Help?
Contact us at contact@signpostingtool.co.uk
Last updated: March 2026