Running your toolkit
Highlights and buttons
Colour key phrases in your cards, switch image icons on or off, and choose the buttons at the top of the signposting page.
- Practice admins
These settings change how every card and the signposting page look for your whole practice. They don’t change any card’s wording, so they don’t send cards to clinical review.
Highlight rules
Highlights colour key phrases wherever they appear in your cards, such as your appointment names, so staff spot them at a glance. They apply to the brief instruction, the Important Notice, the instructions and smart visuals.
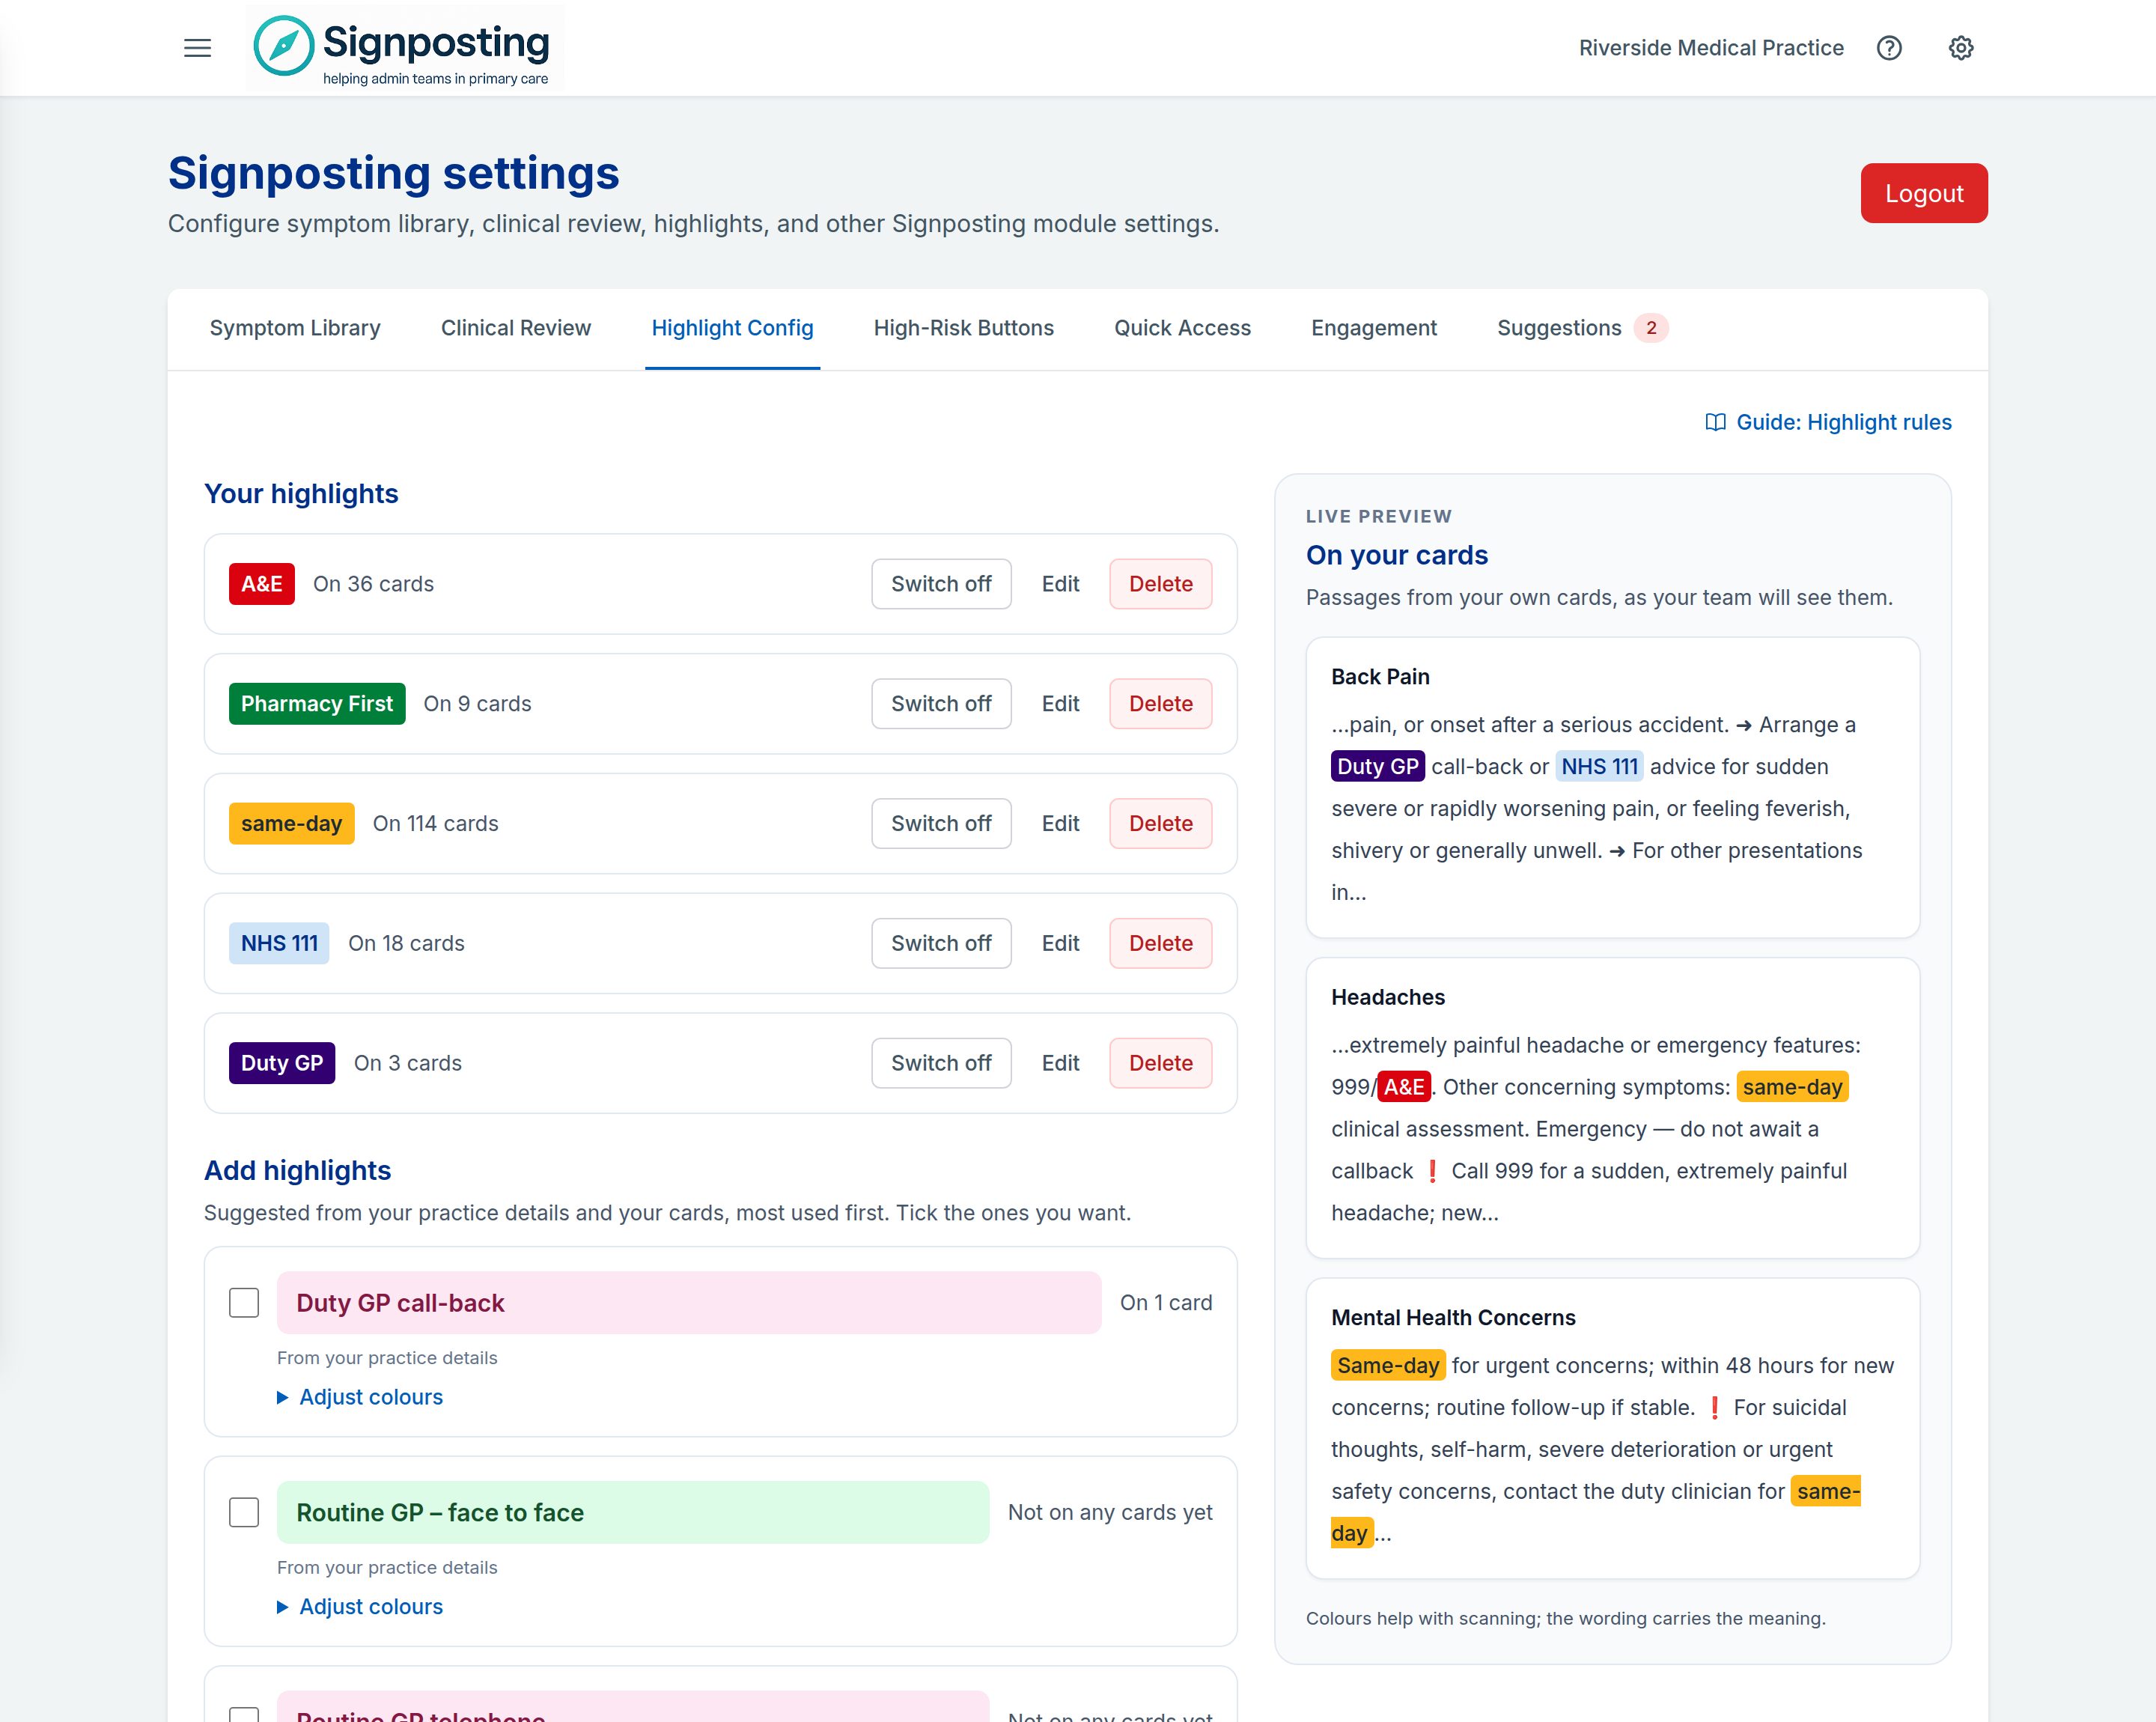
The Choose highlights card on your setup page opens the same editor, with an introduction and a choice to go without highlights. See Whether highlights would help.
Add highlights
Add highlights suggests phrases from your practice details (your appointment names, clinician roles and first escalation) and any colour-slot wording on your cards. The phrases on the most cards come first, and each says how many of your cards it would colour.
- Tick the suggestions you want. To add something else, select + Add a phrase and type it.
- Each phrase gets a readable colour. To change it, open Adjust colours and choose a colour, or pick your own text and background colours.
- Check the preview, which shows passages from your own cards, starting with the cards that use the phrases you’re adding. Use Before and After to compare.
- Select the button below the list, which says how many you’re adding, for example Add 2 highlights. You can add up to 12 at a time.
A highlight colours every card at your practice that contains the phrase, including cards you add later. A phrase that is Not on any cards yet starts colouring as soon as a card uses it.
Where another highlight colours the words instead, the count leaves that card out. For example, if “nurse” is coloured before “practice nurse”, then “practice nurse” can’t colour those words. If that happens on every card with the phrase, it says Another highlight colours it instead. The preview shows which colour your team will see.
Things to know:
- Matching ignores capitals, and short phrases match whole words only, so a highlight for “ear” doesn’t colour “hearing”.
- A phrase is only coloured where it’s written in one piece. It isn’t coloured across a paragraph or line break, where only part of it is bold or in another style, or where its words are spaced differently, such as two spaces apart. The counts, the preview and the suggestions leave those places out too.
- Each phrase can have only one highlight. If you add a phrase that already has one, the editor says so and leaves it out. That includes your highlights that are switched off, and Every practice highlights that are switched on.
- Highlights marked Every practice are set by the Signposting Toolkit team for every practice. You can’t change them.
Change, switch off or delete a highlight
Under Your highlights, each highlight shows how many of your cards it colours.
- Edit changes the phrase or its colours. Select Save changes to keep them.
- Switch off stops a highlight colouring cards without deleting it. Switch on brings it back.
- Delete removes it, after you confirm.
Choose readable colours
The editor only accepts text and background colours with enough contrast to read easily: at least 4.5:1, the WCAG 2.1 AA level for normal text. A highlight in colours that are harder to read is marked Hard to read. You can still switch it on or off, and Edit lets you choose better colours.
- Don’t rely on colour alone. The highlighted words should make sense without it.
- Highlight only key phrases. If too much is coloured, nothing stands out.
- Agree what each colour means at your practice, write it down, and include it in staff training.
Built-in highlights
The toolkit used to colour “green slot”, “orange slot”, “red slot”, “pink” and “purple” for every practice. They were the appointment-book colours of the practice where the toolkit was built, and the shared cards now use appointment names and timings instead of colour slots, so these built-in highlights have been retired:
- If your cards use colour-slot wording, those phrases now have highlights of their own, in the same colours. Some of those colours are marked Hard to read, so consider choosing readable ones. You can change or delete them like any other highlight.
- Otherwise your cards look the same, except that “pink” and “purple” are no longer coloured wherever they appear, such as in “purple rash”.
- New practices start without them.
If your appointment book uses colours, add a highlight for each slot name (colour-slot wording on your cards is suggested for you), and make sure staff know what each colour means.
Image icons
Image icons are small pictures, such as a pharmacy symbol, shown on cards and instruction pages when a card’s brief instruction contains a matching phrase. The Signposting Toolkit team manages the icons, and they are shared by every practice. The current icons are listed at the bottom of the Highlight Config tab.
To show or hide all image icons for your practice, use Switch off or Switch on under Image icons on Highlight Config.
High-risk buttons
The red buttons at the top of the signposting page give staff one-click access to urgent symptoms. What staff see is described in High-risk and quick access buttons.
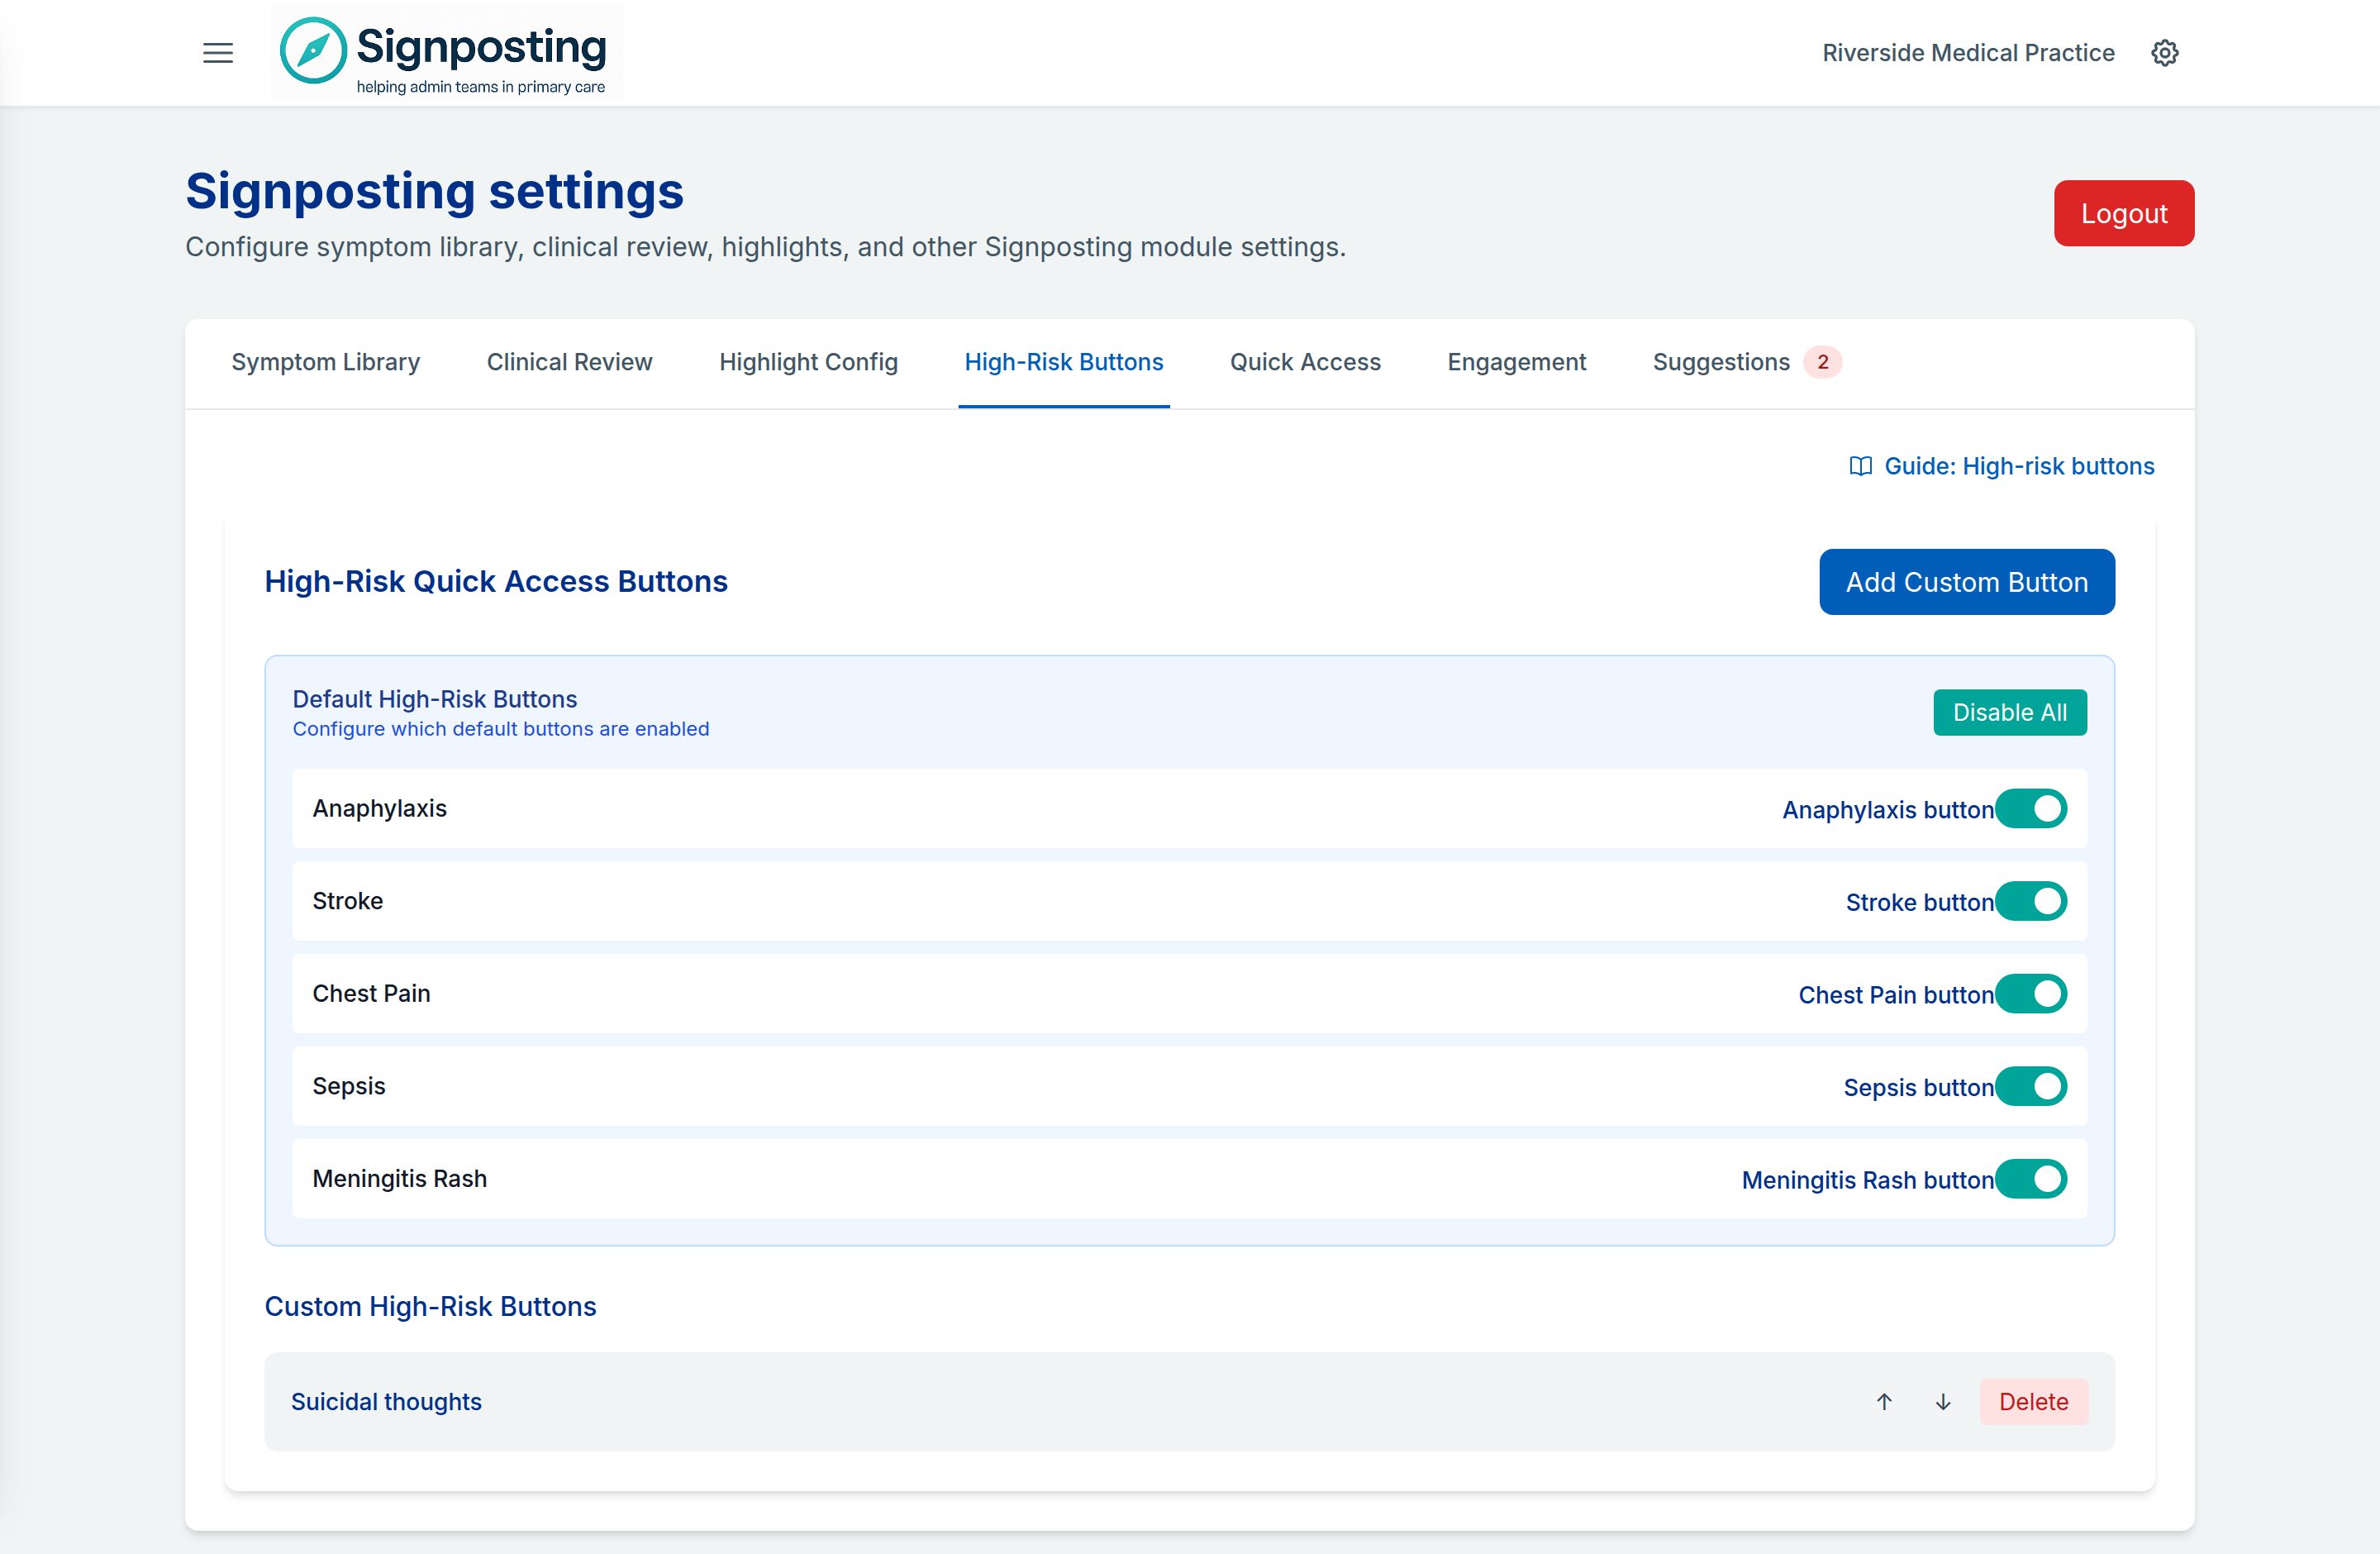
Default buttons
Default High-Risk Buttons lists the standard set, for example Anaphylaxis, Stroke, Chest Pain, Sepsis and Meningitis Rash. The Signposting Toolkit team maintains the set, its labels and its order.
- Switch each button on or off with its switch.
- Use Enable All or Disable All to switch them all at once.
Custom buttons
- Select Add Custom Button.
- Search for the Symptom and select it. The search covers the cards your practice uses, including your own symptoms, by the names your staff see.
- Optionally enter a Button label (optional). If you leave it blank, the symptom name is used.
- Select Add Button.
Your custom buttons are listed under Custom High-Risk Buttons. Use the arrows to change their order, and the delete button to remove one.
Keep the row to the most urgent symptoms so it stands out, and review it when your pathways change.
Quick access buttons
Quick access buttons are a row beneath the red buttons, for your practice’s most common reasons for contact. They’re on from the start, with a starter set of common symptoms such as Cough and Sore Throat, until you choose your own.
☰ MenuSignposting settingsQuick AccessThe tab shows the buttons your staff see now. To choose your own:
- Search for a symptom and select it. You can choose up to 6.
- Optionally give each button a Button label (optional) of up to 32 characters. If you leave it blank, the symptom name is used.
- Use the arrows to set the order, and remove any you don’t need.
- Select Save.
To switch the buttons off, untick Show quick access buttons on the staff home screen and select Save.
Nothing changes for staff until you save.
What’s in the starter set
The first six of these that your practice uses: Abdomen Pain, Acid Reflux, Acne, Acute Medication Request, Chest Infection, Cough, Earache and Sore Throat. Cards you’ve hidden or switched off are skipped, and the next one takes their place.
Related: Cards · Reading a card